Picture this: You sift through a drawer stuffed with old notes, junk mail, and crumpled flyers. Instead of tossing them into the trash, you turn them into fresh, textured sheets perfect for greeting cards or art. That magic happens when you learn how to make paper from recycled scraps.
This process revives waste into something useful. You pulp old paper, spread it thin, and dry it into new pages. It’s a simple craft that echoes ancient techniques but fits modern eco-goals. No fancy factory needed—just household items and a bit of patience.
Recent data shows why this matters. The U.S. Environmental Protection Agency reports that Americans generated about 46 million tons of paper and paperboard in 2018, with a recycling rate of 68.2%—the highest among materials. Yet, nearly 1 billion trees worth of paper still ends up in landfills yearly, per 2025 recycling stats from RTS. The UK’s paper recycling rate now tops 70%, according to National Recycling, proving small actions scale up. By making paper at home, you join this shift and slash your waste.
Ready to dive in? This guide walks you through every step. You’ll gain practical skills, environmental insights, and ideas to spark creativity. Let’s transform scraps into treasures.
Why Recycle Paper at Home? The Big Picture
You might wonder if DIY paper making truly helps. It does—big time. Beyond keeping bins lighter, this craft builds awareness. Families bond over it, kids learn sustainability, and you cut reliance on store-bought supplies.
Start with the environment. Recycling one ton of paper saves 17 trees and 7,000 gallons of water, says the Environmental Paper Network. It also curbs methane from landfills, a gas 21 times more potent than CO2 for warming the planet. EPA data backs this: Paper waste drives 15% of U.S. methane emissions.
Energy wins follow. Producing recycled paper uses 40% less power than virgin stock, per Green America. Water savings hit 60%, easing strain on rivers and treatment plants. Forests breathe easier too—less logging means habitats for wildlife stay intact.
Health perks shine indoors. Skip chemical-heavy new paper; your homemade version avoids bleaches and dyes. Add natural bits like petals for safe, fun touches.
Economically, it shines. No buying blank sheets means more cash for creative tools. Schools save on supplies, and communities host workshops that foster green habits.
Consider real impact. In 2025, global e-waste grows 3-4% yearly, but paper recycling lags in some spots. Your home setup bridges that gap. It empowers you to act local while thinking global.
Synonyms like upcycling waste paper or crafting from junk mail weave in naturally. This isn’t just hobby—it’s stewardship. As you pulp those scraps, you weave a story of renewal.
Gather Your Materials: Simple Tools for Success
You don’t need a workshop to start. Raid your kitchen and recycling bin for most items. Focus on basics first, then upgrade as you go.
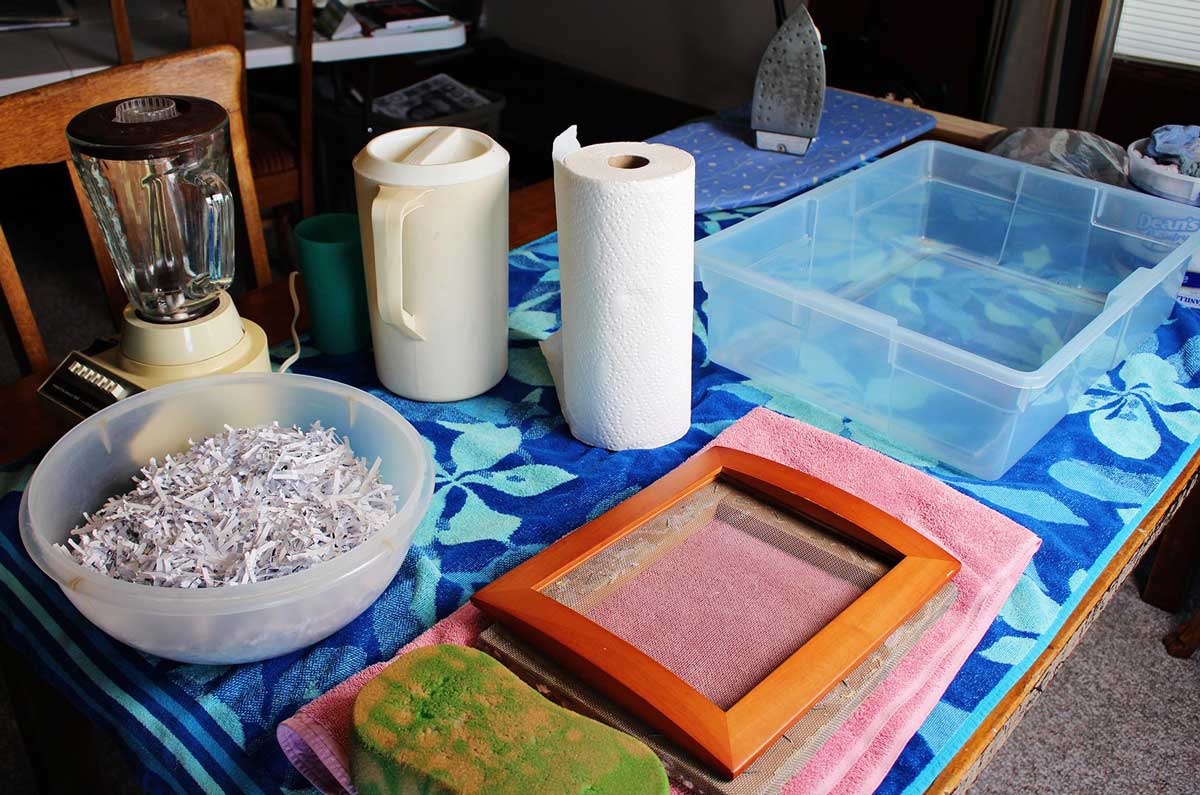
Essential Supplies
- Scrap paper: Aim for 6-8 cups of clean, non-waxy bits. Newspaper, printer paper, junk mail, or envelopes work best. Avoid glossy magazines or taped pieces—they clog the mix.
- Blender or food processor: Pulps paper fast. A basic model handles small batches.
- Large basin or tub: Holds water and pulp slurry. A 9×13-inch baking dish or plastic storage bin fits.
- Screen or mold: Forms the sheet. Use a picture frame with stapled window screen, or a flour sieve for starters.
- Absorbent cloths: Wool felt, old towels, or cotton sheets couch the wet paper.
- Sponge and rolling pin: Press out water and flatten.
- Water: Warm tap works; hot speeds soaking.
Optional Add-Ins for Flair
- Natural embeds: Dried flowers, seeds, or leaves add texture.
- Cornstarch: A tablespoon firms pulp.
- Food coloring: Tints sheets without chemicals.
Budget tip: Total cost stays under $20 if you improvise. Libraries often lend papermaking kits too.
Safety note: Supervise kids near blenders. Wear gloves for dyes.
With these, you’re set. Now, let’s pulp.
Step-by-Step: How to Make Paper from Recycled Scraps
Roll up sleeves—this hands-on process takes 1-2 hours active time, plus drying. Follow these steps for crisp results.
Step 1: Prep Your Scraps
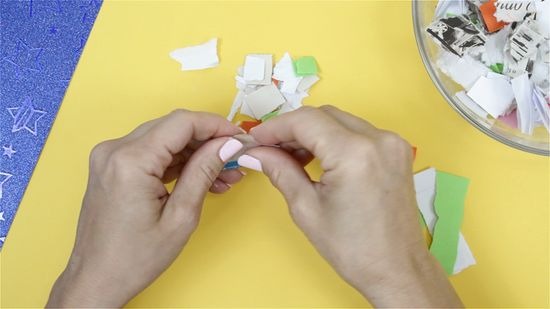
Tear paper into 1-inch squares. Smaller bits pulp smoother. Shred if you have a machine— it saves time. Fill a bowl halfway with pieces.
Why tear? Fibers break easier, blending into fine slurry.
Step 2: Soak the Pulp Base
Cover scraps with hot water—twice the volume. Let sit 4-6 hours or overnight. Stir hourly. Fibers soften, ready for blending.
Pro tip: Overnight soak yields softer paper. Add a splash of vinegar for ink removal if scraps are printed.
Step 3: Blend into Slurry
Scoop soaked paper into blender. Add equal water. Pulse 30-60 seconds until mushy—no chunks. Work in batches to avoid motor strain.
Result? Creamy pulp like oatmeal. This breaks cellulose into usable strands.
Step 4: Mix and Customize
Pour slurry into basin. Fill halfway with water. Stir well. Now, embed extras: Scatter petals or seeds on top later.
For color, stir in drops of natural dye like beet juice.
Step 5: Form the Sheet
Submerge screen in slurry. Lift slowly, tilting for even layer. Excess water drains through.
Shake gently to settle fibers. Perfect for first-timers—aim for thin, uniform spread.
Step 6: Couch and Press
Flip screen onto cloth—wet side down. Peel off carefully. Cover with another cloth. Sponge excess water, then roll with pin.
Press stacks under books for 30 minutes. This bonds fibers tight.
Step 7: Dry Your Creation
Peel sheet onto flat surface. Air-dry 24 hours in sun or warm spot. Avoid direct heat—it warps.
Voila! Textured, recycled paper ready for use.
Troubleshoot: Bubbly sheets? Less water next time. Brittle? More pulp.
Practice yields pros. Your first batch might crinkle, but that’s charm.
Advanced Techniques: Elevate Your Homemade Paper
Master basics? Level up. These tweaks add pro polish.
Build a Mold and Deckle
Craft a frame: Staple mesh to picture frame base (mold). Add loose frame top (deckle) for edges. Dips into slurry, lifts clean sheets.
Why? Consistent size—great for cards.
Experiment with Fibers
Mix in cotton scraps or grass clippings. Ratios: 80% paper, 20% extras. Blends stronger, artistic sheets.
Case: Blend linen for watercolor base—holds paint without bleed.
Bleach Naturally
Hydrogen peroxide lightens gray pulp. Soak 30 minutes post-blend. Eco-safe, no chlorine.
Scale for Batches
Double slurry for multiples. Use wheelbarrow for community events.
These build skill. Share results online—tag #DIYPaperMagic.
Creative Uses for Your Recycled Paper
Don’t stop at sheets. Transform them.
- Greeting cards: Fold, stamp messages. Embed seeds for plantable notes.
- Art journals: Bind into notebooks. Watercolor-friendly if thick.
- Gift wrap: Crumple for rustic look. Tie with twine.
- Origami: Crane shapes from neutral pulp.
- Collage base: Layer with magazine bits.
Kids love seed paper—plant after gifting. Grows wildflowers.
One user shared: “Turned office junk into holiday tags. Family raved.”
Versatile, right? Matches any project.
Troubleshooting Common Issues
Hits snag? Fixes here.
- Lumpy pulp: Blend longer or soak more.
- Tearing sheets: Thicker slurry—less water.
- Wrinkles: Press harder, dry flat.
- Fading color: Use pigment dyes, not food.
Patience solves most. Retry builds intuition.
Environmental and Community Impact: Real Stories
DIY shines in action. Take Fatima Al-Banna’s college project. She rolled newspaper into pencils, recycling student waste. Over 500 made—saved trees, sparked talks.
In Senegal, a cyclist taught girls postcard crafting from school scraps. They fused petals, sold for funds. Empowered, eco-fun.
One Community’s blueprint: Shreds paper for insulation. Boric acid mix insulates homes, reuses tons yearly.
Stats reinforce: Recycling paper cuts CO2 by one metric ton per ton, per EPA. Your batch? Small win, big ripple.
Host workshops. Share slurry recipes. Builds local green networks.
Conclusion
You now hold the know-how to make paper from recycled scraps. From gathering bits to drying masterpieces, each step revives waste. You save resources, spark joy, and model sustainability.
Key takeaways: Start simple, experiment bold, share wide. One sheet inspires many.
Grab those scraps today. Blend, form, create. What’s your first project? Dive in—your planet thanks you.
Related Topics: Blueland Clean Essentials Kit Review
FAQs
What types of paper scraps work best for recycling?
Clean, unwaxed printer paper, newspaper, and envelopes pulp well. Avoid plastic-coated or taped items—they ruin texture.
How long does homemade paper take to dry?
Air-drying needs 24 hours. Sun speeds it to 4-6 hours. Press flat for smooth finish.
Can I add colors or embeds to my paper?
Yes! Stir natural dyes like turmeric for tints. Scatter petals or threads before couching for flair.
Is making paper from scraps safe for kids?
With supervision near blenders, absolutely. It teaches recycling hands-on.
How does this reduce environmental waste?
Each batch saves water and energy. Scales to cut landfill methane—key for climate health.
References
- RTS Recycling Facts & Statistics for 2025: https://www.rts.com/blog/recycling-facts-statistics/
- U.S. EPA Paper and Paperboard Material-Specific Data: https://www.epa.gov/facts-and-figures-about-materials-waste-and-recycling/paper-and-paperboard-material-specific-data
- National Recycling UK Statistics 2025: https://nationalrecycling.co.uk/recycling-statistics/
- Environmental Paper Network Benefits: https://greenamerica.org/save-trees/why-recycled-paper
- WikiHow Step-by-Step Guide: https://www.wikihow.com/Make-Recycled-Paper
- EcoMENA Case Study: https://www.ecomena.org/paper-recycling/